Prototyping is a fundamental part of the design thinking process – a bridge between ideas and tangible experiences. It transforms early concepts into testable models, allowing teams to validate assumptions, refine interactions, and gather meaningful feedback before committing to full development. Through years of web and product design work, I’ve seen how the right prototyping approach not only improves usability but also strengthens collaboration and speeds up time-to-market.
This article explores why prototyping matters, the different types and processes involved, and my personal workflow and philosophy when building prototypes that help shape intuitive, user-centered digital products.
Why Prototyping Matters
Prototyping isn’t just a design step, it’s a strategic tool. It minimizes risk, increases clarity, and allows teams to explore solutions with confidence.
1. Test Before You Build
A prototype is your early reality check. It lets you experiment with user flows, features, and interactions without expensive development work.
2. User-Centered Validation
Early prototypes allow real users and stakeholders to experience the design. Their reactions and behavior guide the direction, ensuring you’re solving real problems, not assumptions.
3. Faster Iteration, Lower Cost
Because prototypes are easy to modify, feedback can be applied quickly. You can pivot, refine, or even scrap an idea while still in exploration mode.
4. Clearer Communication Across Teams
Prototypes translate ideas into something visual, interactive, and understandable. Developers, stakeholders, and non-designers can see exactly how the product is meant to work.
5. Early Adaptability and Alignment
Teams can align their expectations early. Stakeholders gain a sense of ownership, and designers gain clarity on requirements, reducing miscommunication later.
6. Better Time-to-Market
With stronger foundations and fewer development revisions, projects move forward smoothly and efficiently.
Types of Prototypes
Different stages of design require different levels of fidelity. Choosing the right one ensures you get the most useful feedback at the right time.
Low-Fidelity & Mid-Fidelity Prototypes
These include sketches, paper mockups, and simple wireframes created quickly to visualize structure and flows.
Pros:
- Fast and inexpensive
- Easy to update and test
- Allows big-picture exploration
- Encourages creativity
- Easy for anyone on the team to contribute
Cons:
- Lacks realism
- Users may struggle to understand flows
- Oversimplifies interactions
- No interactivity
- Harder to foresee actual user behavior
High-Fidelity Prototypes (Digital or HTML/JS)
High-fidelity prototypes closely resemble the final product, including design elements and interactive features.
Pros:
- More accurate user testing
- Engaging and realistic
- Helps stakeholders clearly visualize the final product
Cons:
- More time-consuming
- Users may focus too heavily on aesthetics
- Risk of mistaking it for the finished product
Paper Prototyping
Paper prototypes are quick, hand-drawn layouts used during early brainstorming sessions or workshops.
Advantages:
- Fast
- Cheap
- Encourages team collaboration
- Strong visual documentation
Disadvantages:
- Not realistic
- No real interactions
- Risk of “false positives” when users imagine functionality
Digital or HTML Prototypes
Digital prototypes – whether low-fi wireframes or fully interactive hi-fi mockups, bridge the gap between ideas and actual interfaces.
Advantages:
- Realistic interactions
- Flexible and easy to iterate
- Faster validation
Disadvantages:
- Higher learning curve
- May require extra time and resources
The Prototyping Process
A strong prototyping workflow moves through a series of iterative steps, each building on the last.
1. Pre-Sketch / Planning
Before drawing anything, I establish clarity:
- Project goals
- Competitive analysis
- Target users and their motivations
- Platform/device
- Complete list of deliverables
This alignment ensures the prototype solves real user needs.
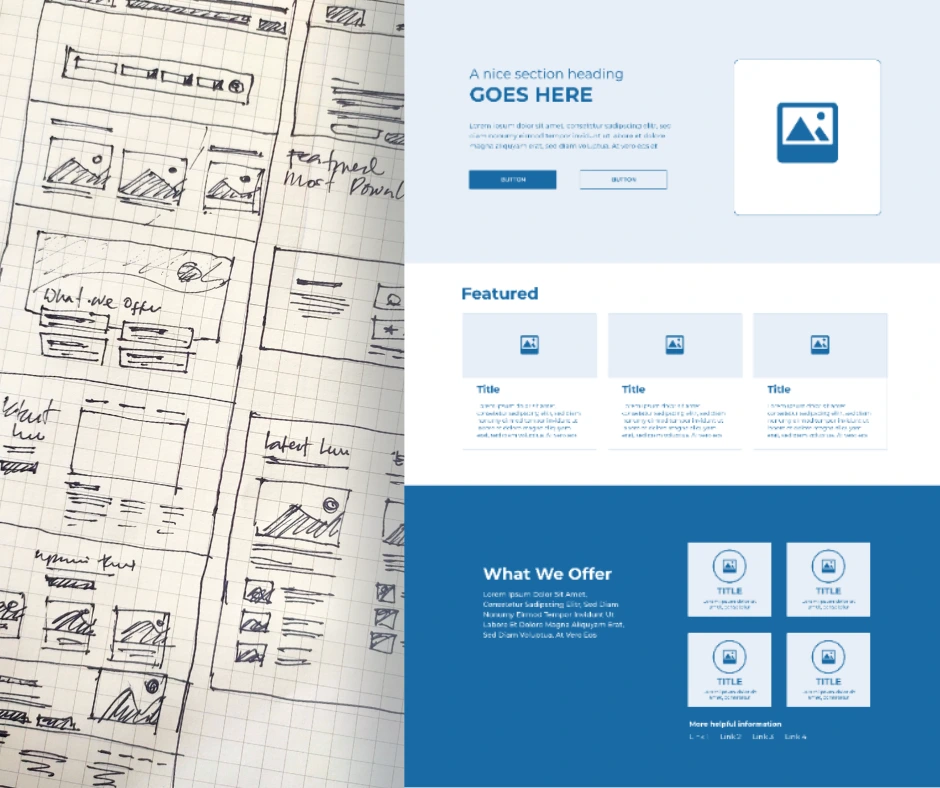
2. Ideation & Sketching
This is where ideas begin to take shape.
- Pen-and-paper sketches
- Whiteboard diagrams
- Mapping out key screens
- Identifying the most critical user flows
The goal is to visualize ideas quickly without worrying about aesthetics.
3. Low-Fidelity Wireframes
Next, sketches become structured digital layouts.
- Created in Figma, Adobe XD, or Sketch
- Focus on layout, hierarchy, and navigation
- Define essential elements and page relationships
This phase lays the foundation for interactive prototypes.
4. Interactive Prototypes
With wireframes ready, I connect screens to build a clickable model.
- Buttons, links, form flows
- Basic transitions
- Simple animations if needed
This allows for early functional testing and feedback.
5. User Testing & Feedback
I share the prototype with users or stakeholders.
I look for:
- Where they get stuck
- How they navigate
- What confuses or frustrates them
- Completion times and click paths (quantitative)
- Opinions, emotions, suggestions (qualitative)
Real feedback reveals gaps and opportunities.
6. Refinement & Iteration
Based on testing insights:
- Adjust navigation
- Simplify flows
- Improve clarity
- Tweak layouts
- Repeat testing if needed
Iteration is where good prototypes become great ones.
7. High-Fidelity Prototype
Once the structure and flows are validated:
- Apply branding
- Add typography and real assets
- Use finalized colors and design components
- Build near-production-level interactions
This prototype becomes the reference for developers.
8. Code-Based Prototyping (When Needed)
For complex interactions or early engineering alignment, I sometimes build HTML/JS prototypes to preview real behavior.
Tools for Prototyping
Depending on the project:
- Figma — collaborative design, prototyping, and design systems
- Adobe XD — clean interactions and visual design
- InVision — sharing prototypes and animated transitions
- Miro / Whimsical — great for brainstorming and mapping flows
Common Challenges & How to Overcome Them
| Challenge | Solution |
|---|---|
| Stakeholders want visual polish too early | Educate them on low-fi purpose: function first, visuals later. |
| Prototype feels slow or overwhelming | Simplify. Focus only on core user flows first. |
| Users misunderstand navigation | Revisit structure, add clearer labels, retest with fresh users. |
| Too many iterations stall progress | Set acceptance criteria and define what “good enough” looks like. |
My Prototyping Philosophy
These principles can be our guide in building better and meaningful prototypes.
Design With Intention
- Every screen and interaction should contribute to solving a real problem.
Fail Fast, Learn Fast
- Mistakes made early are cheaper and more valuable than mistakes made late.
Keep Users at the Center
- A prototype is not for the designer; it’s for the people who will use the product.
Iterate Intentionally
- Great design emerges from cycles of building, testing, and refining. Repetition is part of the process.
Conclusion
Prototyping is far more than a preliminary stage – it’s an essential method for building meaningful, user-centered digital products. By sketching, wireframing, testing, iterating, and refining prototypes, designers and teams gain clarity, alignment, and confidence before moving into development.
If you’re working on a digital product, website, or platform, prototype early and often. You’ll save time, reduce cost, and create a far better experience for your users.